Apple Calendar includes built-in alerts that can remind you about upcoming meetings, appointments, and events on your calendar. You can set alerts for individual events, choose default alert times for new events, and—depending on the device you use—set multiple alerts or receive a reminder by email.
Reminding other people is different.
Apple Calendar does not provide a general-purpose way to automatically send custom email or SMS reminders to clients, customers, students, or other event attendees before an appointment or meeting.
If you need those capabilities, you can connect an Apple/iCloud-hosted calendar to an automation service such as Timelier. Timelier supports two ways to connect Apple calendars: directly via Apple’s secure CalDAV protocol using an App-Specific Password (recommended), or by using a public ICS subscription URL.
This guide explains both sides:
- how to use Apple’s built-in Calendar alerts for yourself, and
- how to add automated email and SMS reminders when you need to remind other people.
Apple Calendar Reminder Options at a Glance
| What you want to do | Apple Calendar | With Timelier |
|---|---|---|
| Alert yourself before an event | ✓ | ✓ |
| Set default alerts for new events | ✓ | ✓ |
| Set multiple personal alerts | ✓, depending on device/account | ✓ |
| Receive an email reminder yourself | ✓ on Mac | ✓ |
| Automatically email event attendees | No general-purpose feature | ✓ |
| Automatically send SMS/text reminders to attendees | No | ✓ |
| Customize reminder messages sent to attendees | No | ✓ |
| Apply reminders only to certain types of events | Limited (Birthdays, Events, All-Day) | ✓ |
How Apple Calendar Alerts Work
Apple Calendar alerts are primarily designed to make sure you don’t forget your own events.
For example, you can have Apple’s Calendar app alert you 15 minutes before an appointment, alert you the day before an event, or alert you when it’s time to leave based on the event’s location.
Apple also lets you configure default alert times so that you don’t have to add an alert manually every time you create an event.
The exact options differ a bit depending on whether you use the Calendar app on an iPhone or iPad, a Mac, or iCloud.com.
An Apple Calendar alert is different from a reminder sent to another person
Setting an alert on an event does not mean Apple will send that same reminder to everyone invited to the event.
An event invitation lets the attendees add the event to their own calendars, but those attendees generally rely on the reminder and notification settings in their own calendar applications.
If you specifically need to make sure a customer, client, student, patient, or other attendee receives a reminder before the appointment, you need either a manual communication or an automated reminder service.
We’ll cover those options later in this guide.
How to Set Personal Apple Calendar Alerts
Apple Calendar alerts remind you about upcoming appointments on your devices. Select your platform below to view setup steps, default alert times, and notification settings:
Set an Alert for an Individual Event on iPhone or iPad
- Open the Calendar app.
- Tap the event you want to change.
- Tap Edit.
- Tap Alert.
- Choose when you want to be reminded—for example, at the time of the event, 5 minutes before, or another available interval.
- Tap Done.
If the event includes a location, Apple Calendar can also use location and traffic information to determine when you need to leave.
Set Default Alert Times on iPhone
If you normally want the same reminder timing for every event, you can set a default instead of configuring each event individually on current versions of iOS:
- Open Settings.
- Tap Apps.
- Tap Calendar.
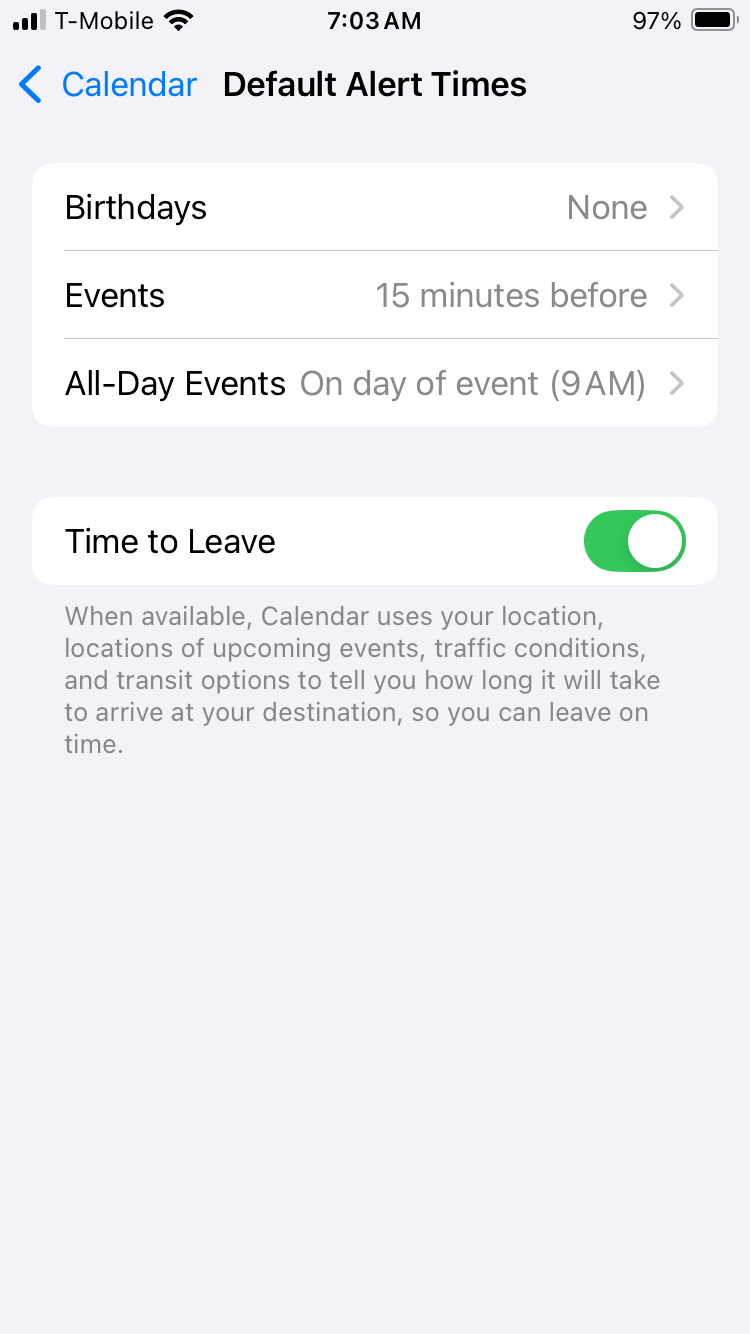
- Tap Default Alert Times.
- Choose Events, All-Day Events, or Birthdays.
- Select when you want the default alert to occur.
You can also turn Time to Leave alerts on or off from this area, but to do this you must give the Calendar app access to your precise location (go to Settings > Privacy & Security > Location Services > Calendar; under “Allow Location Access” select “While Using the App,” then toggle on “Precise Location.”)
Ensure Calendar Notifications Are Enabled on iPhone
Setting an event alert does not help if iOS is not allowed to display Calendar notifications:
- Open Settings.
- Tap Notifications.
- Tap Calendar.
- Turn on Allow Notifications.
From this screen, you can also enable Lock Screen, Notification Center, Banners, Sounds, and Time Sensitive Notifications (delivers alerts even during Focus modes).
Set an Alert on Mac
To set an alert for an individual event in Calendar for macOS:
- Open Calendar.
- Double-click or force-click the event.
- Click the event’s time to display the event details.
- Open the Alert menu.
- Choose when you want to be reminded.
You can add more than one alert to an event (e.g., one reminder the day before and another 15 minutes before the meeting).
Custom Alert Types on Mac
- Message with sound — displays a notification and plays a sound.
- Email — sends an email reminder to yourself.
- Open file — opens a selected file when the alert triggers.
Note: The email option sends an alert to your own inbox; it does not automatically email other participants attending the event.
Set Default Alerts on Mac
- Open Calendar.
- Choose Calendar > Settings.
- Click Alerts.
- Select the calendar account you want to configure.
- Choose default alert times for Events, All-Day Events, or Birthdays, and optionally enable Time to Leave notifications.
Set an Alert on iCloud.com
- Go to iCloud.com/Calendar and sign in.
- Open the event.
- Choose an option from the Alert menu.
- If desired, click 2nd Alert to add another reminder.
- Select Save.
Set Default Alerts on iCloud.com
To set default alerts for newly created events in the web interface, open Settings > Events > Default Alert.
Can Apple Calendar Automatically Send Reminders to Guests?
Apple Calendar can send event invitations and event updates to people you invite, but it does not provide a general-purpose feature for automatically sending custom reminder messages to those attendees before an event.
For example, there is no Apple Calendar setting that lets you say:
- email every attendee 24 hours before an appointment;
- send another reminder one hour before the event;
- remind only people who have not responded; or
- automatically send a custom message containing preparation instructions or a cancellation policy.
Apple does provide some useful manual ways to contact event attendees.
On an iPhone or iPad, you can open an event, tap Invitees, and use the mail button to email the people attending the event.
On a Mac, you can Control-click an event and choose Email All Participants or Message All Participants.
These options are useful when you only occasionally need to contact attendees. The limitation is that you have to remember to send each message yourself.
If you regularly schedule appointments, lessons, consultations, meetings, or other events where attendees need reminders, an automation service such as Timelier can send those messages automatically based on the events on your Apple Calendar.
Can Apple Calendar Send SMS or Text Reminders?
Apple Calendar does not provide a built-in way to automatically send SMS or text-message reminders based on upcoming calendar events.
There are a couple of Apple features that sound similar but work differently.
On a Mac, Calendar’s Message All Participants option lets you manually send a message to people attending an event. It does not schedule the message automatically based on the event’s start time.
Apple’s Messages app also has a Send Later feature that lets you manually schedule an iMessage for a future time. This can be useful for an occasional message, but the scheduled message is independent of the Calendar event. If the appointment is moved or canceled, the scheduled message does not automatically move or cancel with it.
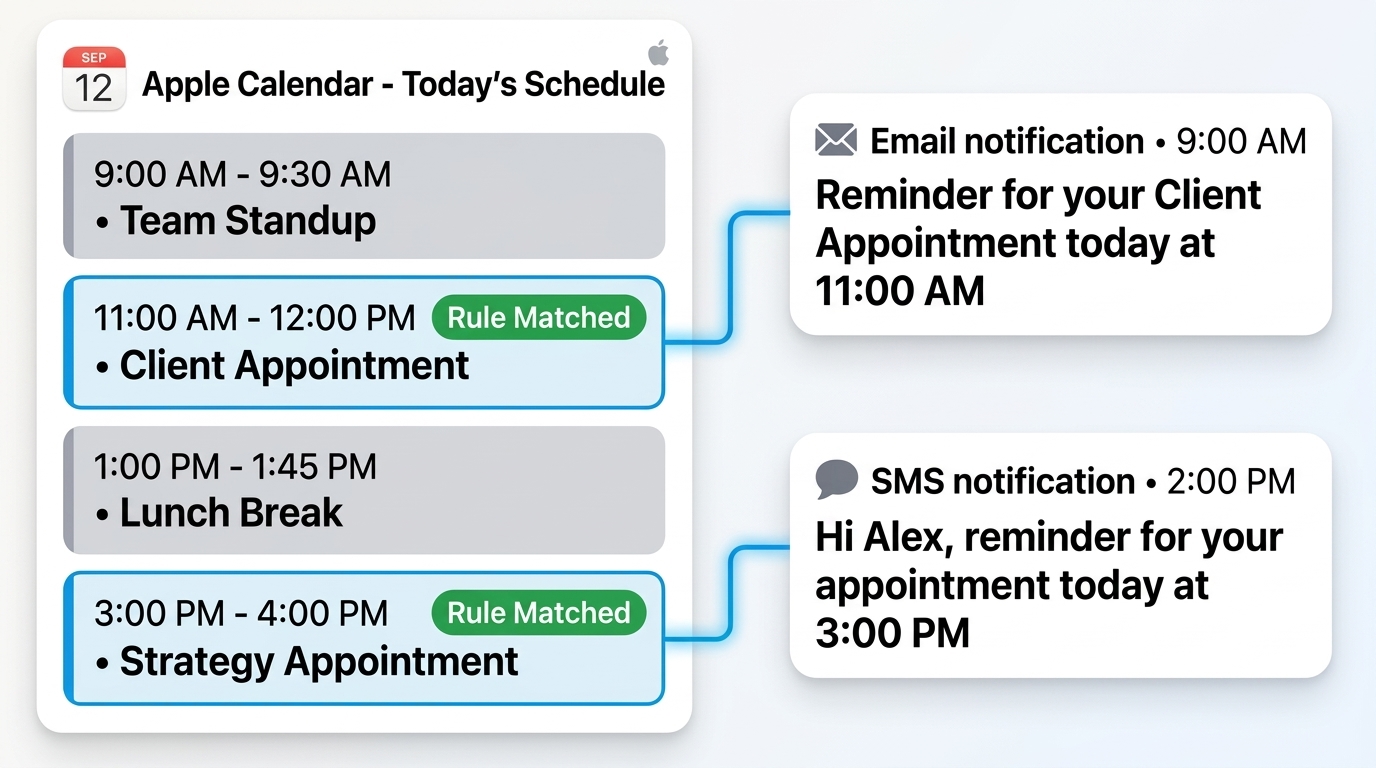
For appointment reminders that should stay tied to the events on your calendar, Timelier can monitor an iCloud calendar and automatically send SMS reminders as matching events approach.
For example, you could:
- text a client one day before an appointment;
- send another text one hour before the appointment;
- send texts only for events whose title contains a particular word;
- send different reminders for different types of appointments; or
- send both an email and an SMS reminder for the same event.
Automate Apple Calendar Reminders With Timelier
Timelier can use events on an Apple/iCloud Calendar to automatically send email and SMS reminders.
Instead of creating each reminder manually, you create rules that determine:
- which events should receive reminders;
- when the reminders should be sent;
- whether they should be sent by email, SMS, or both;
- who should receive them; and
- what each reminder should say.
For example, a music teacher could create a rule that finds calendar events containing the word Lesson and sends the student a reminder the day before.
A contractor could create a rule for events containing Estimate and text the homeowner two hours before the appointment.
Or you could use Timelier to send additional reminders to yourself when Apple’s built-in alerts do not provide the timing or type of notification you want.
The main difference between using Timelier with Apple Calendar and using it with Google or Microsoft calendars is how the calendar is connected. Google and Microsoft accounts use OAuth popups. For Apple Calendar, Timelier gives you two flexible options:
- Option 1 (Recommended): Connect directly via CalDAV using a secure Apple App-Specific Password. This keeps your calendar completely private, syncs automatically, and lets Timelier access all calendars on your iCloud account.
- Option 2: Connect via a public ICS subscription link. This is a read-only feed option for individual calendars or shared event feeds where you prefer not to connect your Apple account credentials.
Connect Apple Calendar to Timelier
Timelier gives you two flexible methods to connect Apple-hosted calendars. Select your preferred method below:
Timelier supports syncing directly with Apple iCloud Calendar via Apple’s secure CalDAV protocol. Because Apple requires two-factor authentication for all Apple accounts, third-party services like Timelier connect using an App-Specific Password rather than your personal Apple ID password.
Step 1: Generate an App-Specific Password in Apple
- Sign in to your Apple Account management page at account.apple.com.
- In the Sign-In and Security section, select App-Specific Passwords.
- Click Generate an app-specific password (or the + button).
- Enter a recognizable label (such as
Timelier) and click Create. - Copy the 16-character generated password (formatted as
xxxx-xxxx-xxxx-xxxx).
Step 2: Connect iCloud in Timelier
- In Timelier, go to Sources > Add Source.
- Click the Apple iCloud Calendar option.
- Enter your iCloud Email Address (your
@icloud.com,@me.com, or@mac.comaddress). - Paste the 16-character App-Specific Password you generated in Step 1.
- (Optional) Enter an Account Name (e.g., Personal iCloud) to identify this calendar account in Timelier.
- Click Connect Apple Account. Timelier will connect via CalDAV and automatically discover all your calendars.
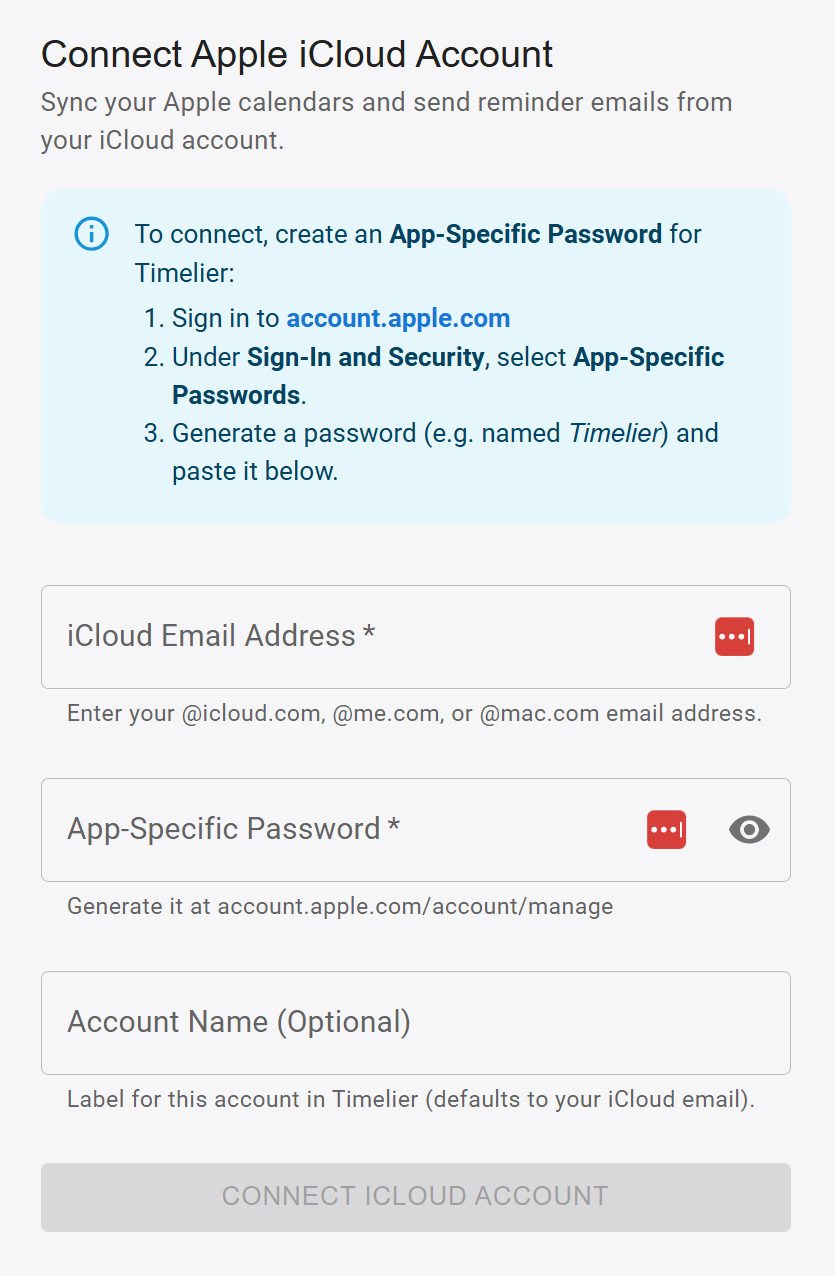
@icloud.com, @me.com, or @mac.com address in the email field.
If you prefer not to connect your Apple account credentials, or if you only need Timelier to monitor a specific shared or public calendar feed, you can connect using Apple Calendar’s public ICS (iCalendar) subscription URL.
Apple generates this URL when you enable Public Calendar for a specific calendar. The connection is read-only, allowing Timelier to view your event times and titles without modifying or deleting anything on your calendar.
Step 1: Get the Public Calendar URL
Follow the steps for your device to obtain the ICS subscription URL:
On iPhone or iPad
- Open the Calendar app.
- Tap Calendars at the bottom of the screen.
- Find the iCloud calendar you want Timelier to monitor.
- Tap the Info button (the “i” icon) next to the calendar.
- Turn on Public Calendar.
- Tap Share Link and copy the URL.
On Mac
- Open the Calendar app.
- If the calendar list is hidden, choose View > Show Calendar List.
- Move your pointer over the iCloud calendar’s name and click the Share Calendar button (or right-click).
- Check the box for Public Calendar.
- Copy the calendar’s subscription link.
On iCloud.com
- Go to iCloud.com/Calendar and sign in.
- Click the Share button next to the calendar in the sidebar.
- Turn on Public Calendar.
- Click Copy Link to copy the calendar URL.
Step 2: Connect the ICS Feed in Timelier
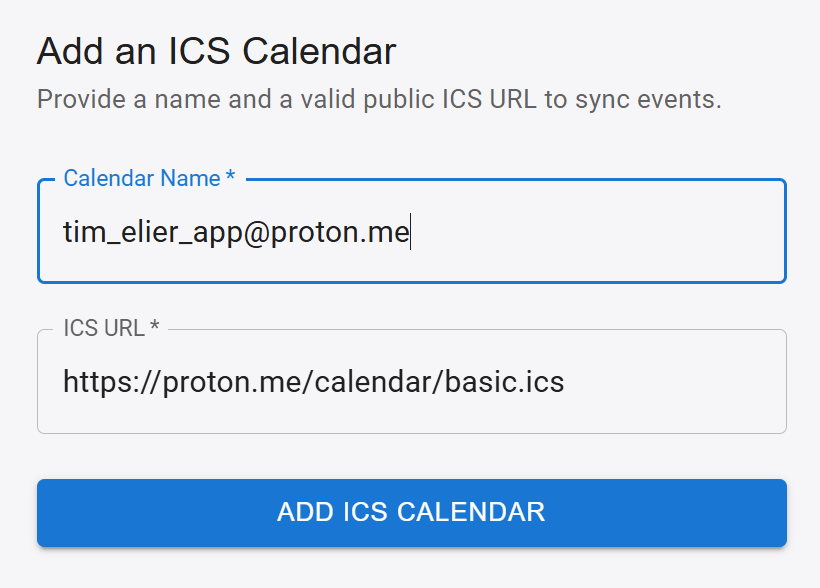
- In Timelier, go to Sources > Add Source.
- Click the ICS option.
- Enter a recognizable Name for the calendar feed.
- Paste the URL (.ics link) into the URL field.
- Click Save. Timelier will immediately verify the feed and begin syncing your events.
How to Set Up Automated Reminder Rules in Timelier
Once your Apple Calendar is connected (either via CalDAV or ICS), you can create automated reminder rules that run in the background without requiring manual effort:
- Create a Rule: In the Timelier dashboard, navigate to Reminder Rules and click Create Rule (or choose a ready-to-use template).
- Select Your Calendar: Choose your connected Apple account. If connected via CalDAV, you can select specific calendars (such as Work, Lessons, or Client Appointments).
- Filter Events (Optional): Set keywords so reminders only trigger for specific appointments—for example, events whose title contains “Lesson,” “Estimate,” “Consultation,” or leave blank to match all events.
- Choose Recipients: Decide who should be reminded: yourself, meeting invitees/attendees, or extracted guest contacts (such as phone numbers or email addresses found in the event description).
- Configure Delivery Channels & Timing: Choose whether to send an Email, an SMS text message, or both. Set delivery timing—such as 24 hours before the appointment, with an optional follow-up 2 hours before.
- Customize Message Templates: Tailor your messages with dynamic placeholders like
{{EventTitle}},{{EventStartTime}}, and{{Location}}to ensure guests have exact meeting details, directions, or cancellation guidelines.